Captain Tutorials
Captain Tutorials


Sections:
How to Register
Accept Orders
Creating Trips
Domestic Orders
Favorite Cities
Withdraw Balance
Redeem Rewards
Sections:
How to Register
Accept Orders
Creating Trips
Domestic Orders
Favorite City Notifications
Withdraw Balance
Redeem Rewards
Register as Captain
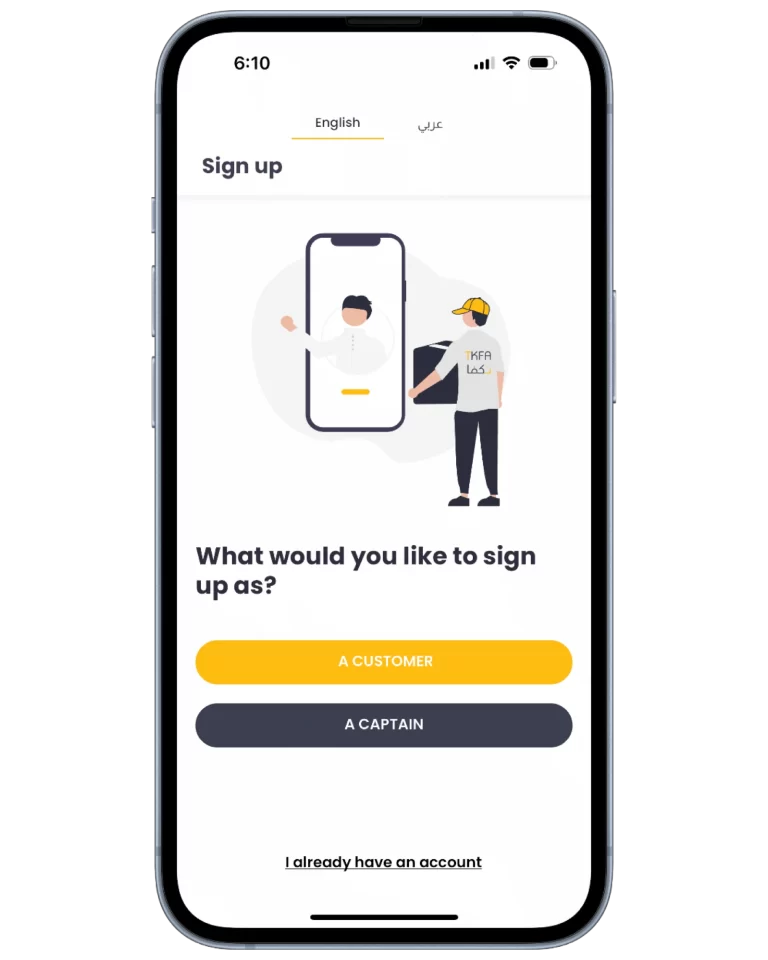
(1) Register
- Select sign up as Captain
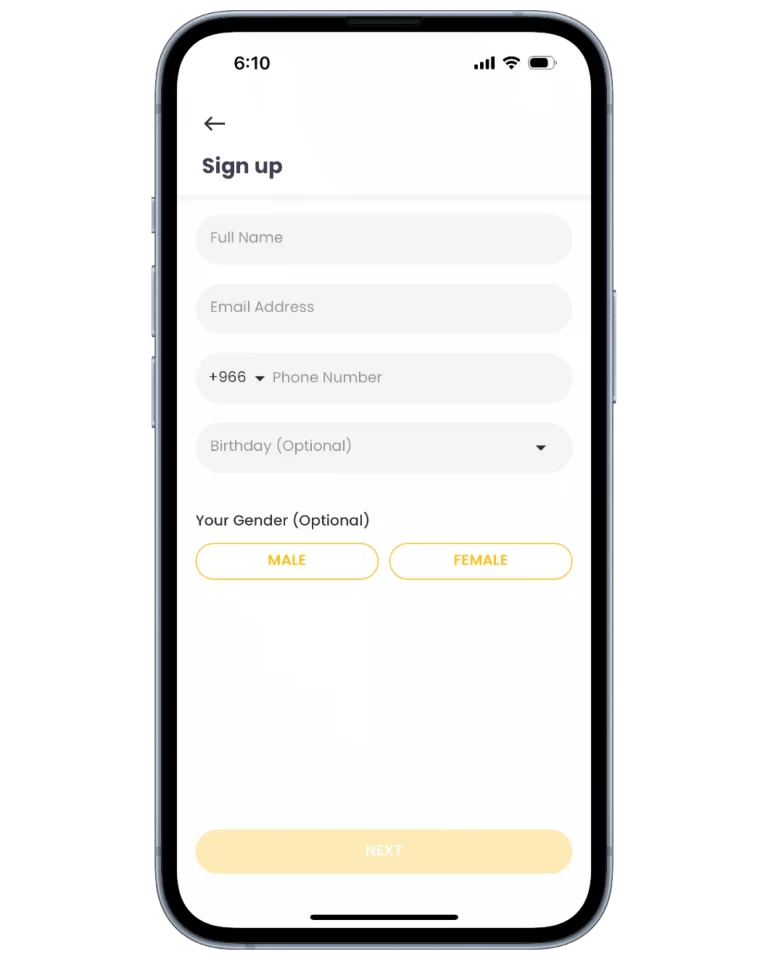
(2) Captain Details
- Fill out your details

(3) Identity
- Verify your identity
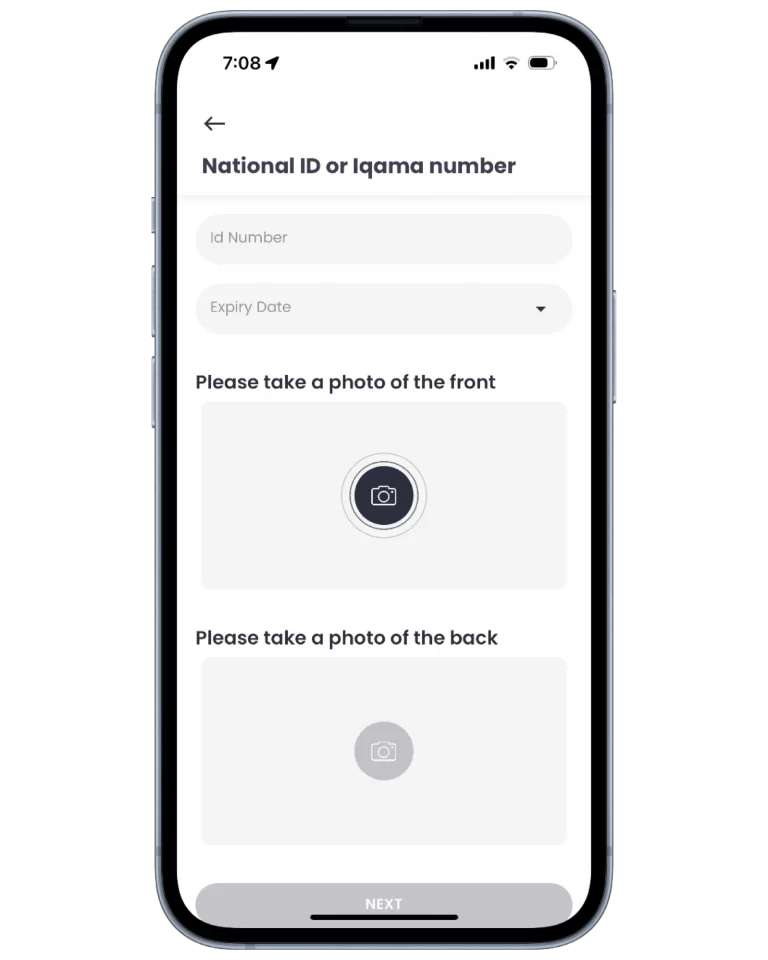
(4) National ID/Iqama
- Enter your National ID or Iqama number & expiry
- Upload ID photos
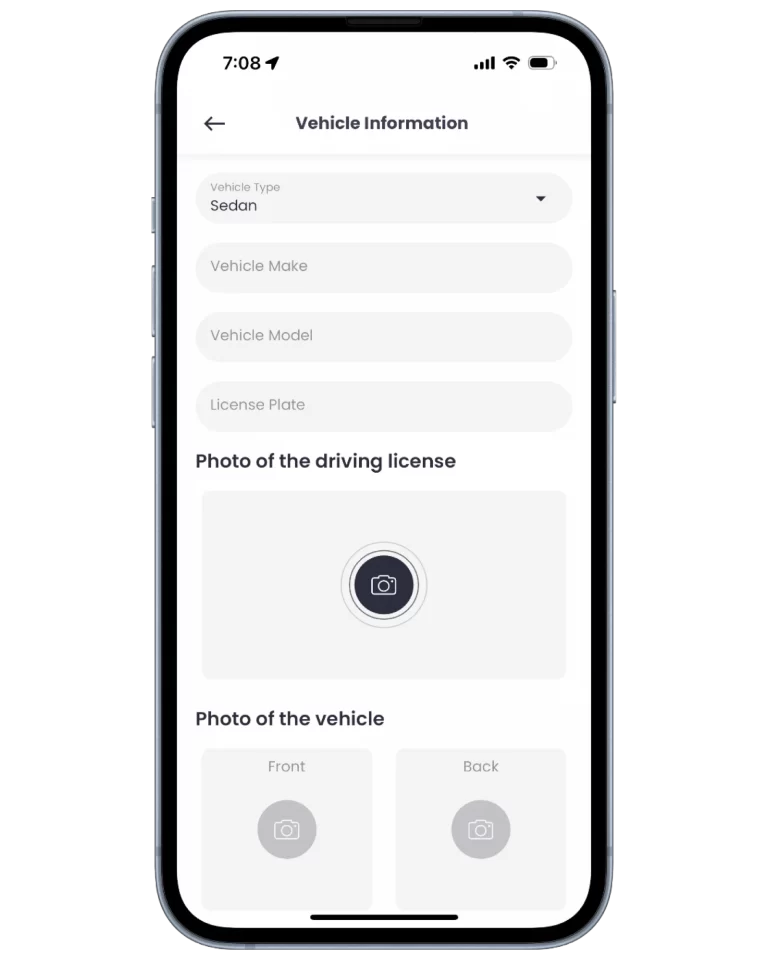
(5) Vehicle Details
- Fill out your vehicle details
- Upload vehicle photos
Register as Captain
(1) Register
- Select sign up as Captain
(2) Captain Details
- Fill out your details
(3) Identity
- Verify your identity
(4) National ID/Iqama
- Enter your National ID or Iqama number & expiry
- Upload ID photos
(5) Vehicle Details
- Fill out your vehicle details
- Upload vehicle photos
Accepting Orders & Process
What is the suggested delivery offer?
The suggested offer is automatically calculated based on distance from Store to Drop off point & the time of day
Peak hours have higher delivery fee suggestions, as well as earning extra bonus points for completing orders.
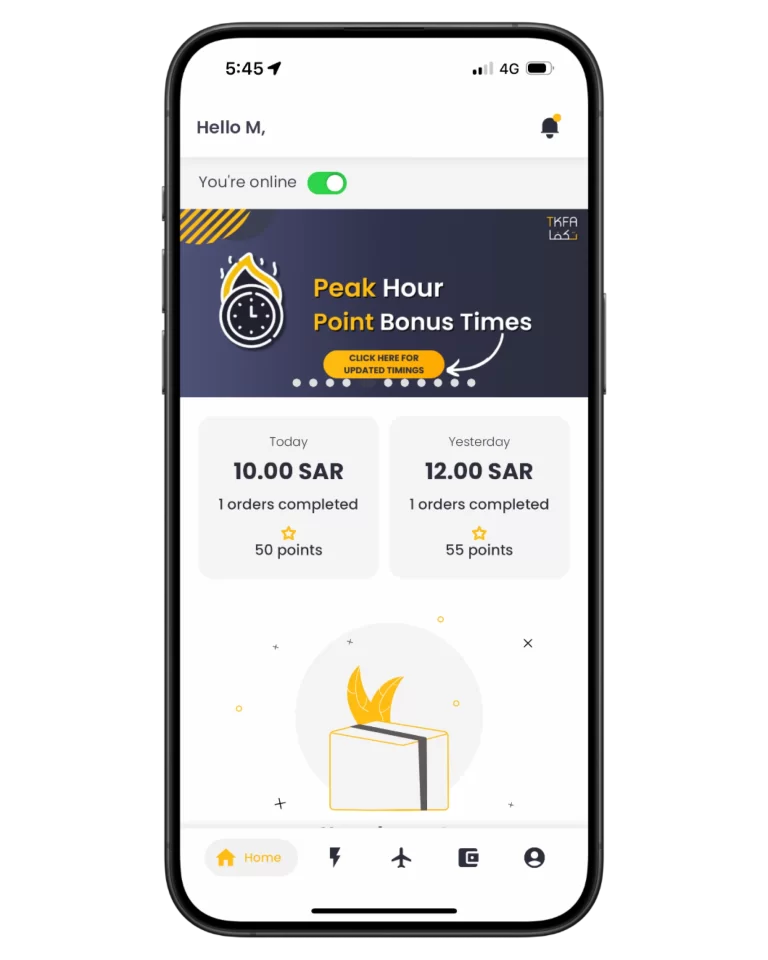
(1) Receiving Orders
- Make sure to enable “Online” to receive orders
- Offline: you won’t receive orders
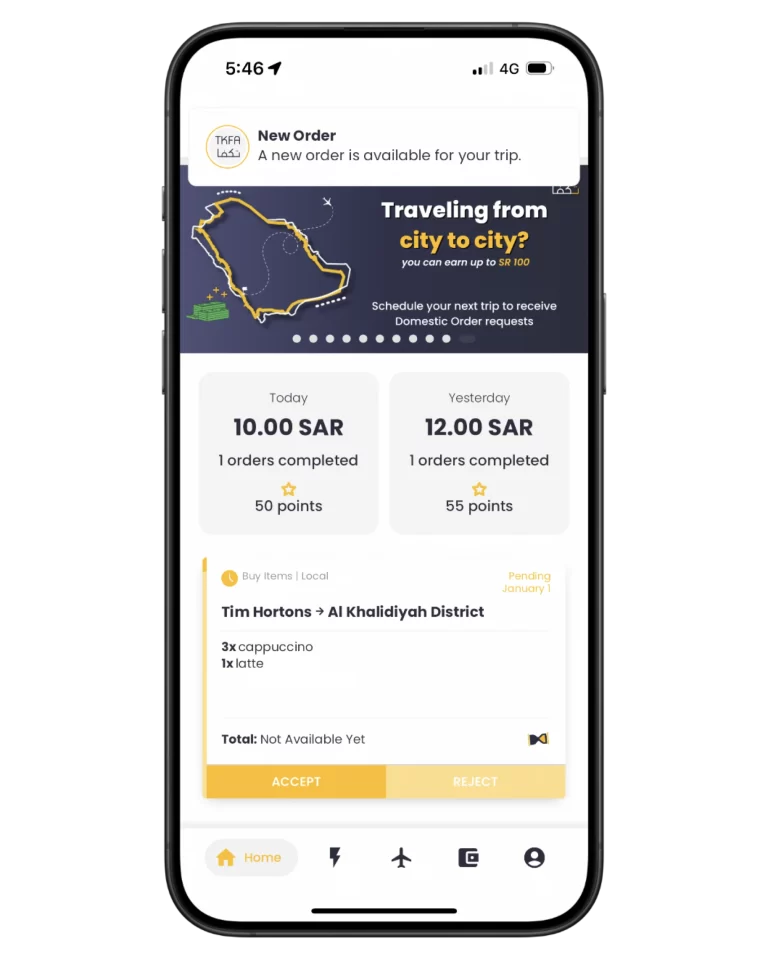
(2) New Orders
- New orders will appear in the homepage
- Click on the order to view details
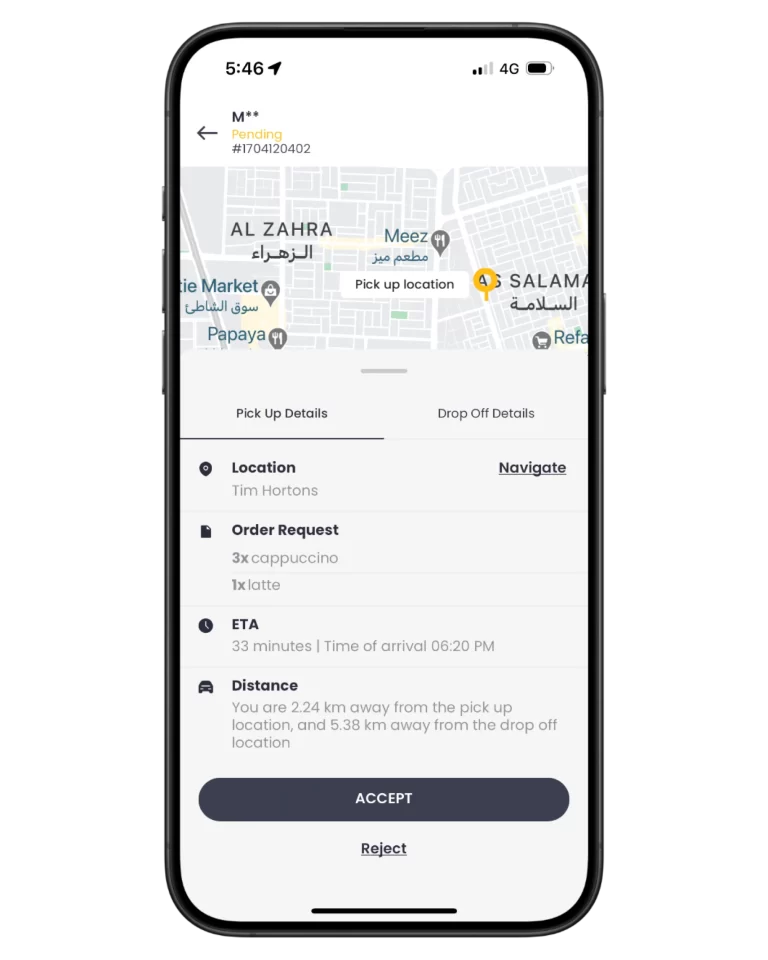
(3) Accept Order
- Click on “Accept” to place your delivery fee
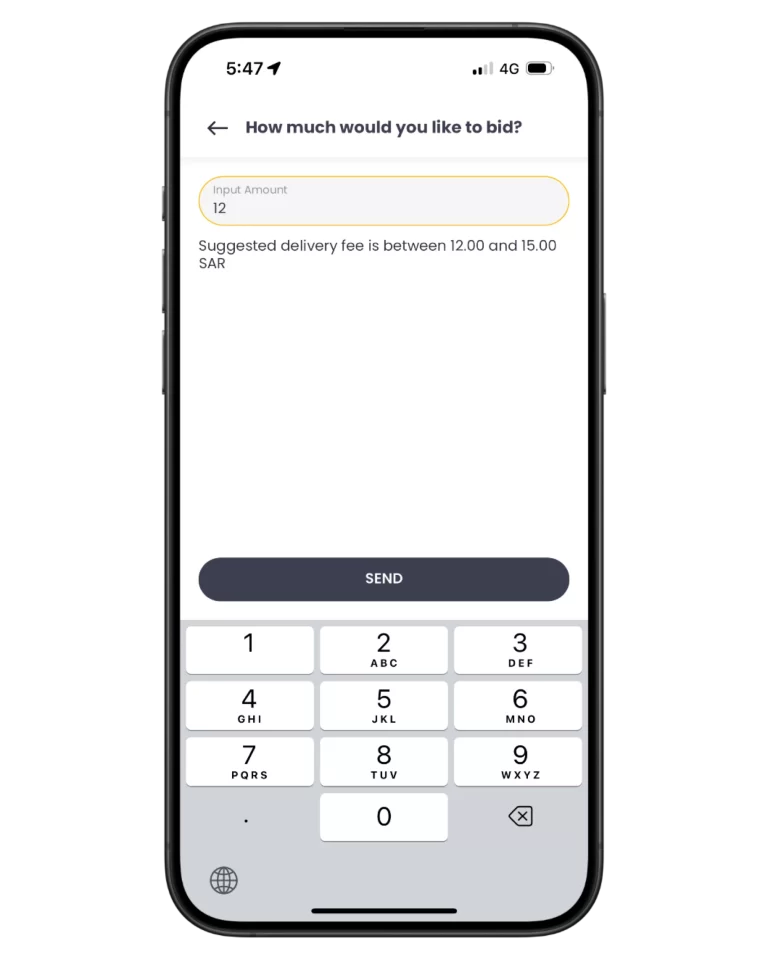
(4) Delivery Fee
- Enter your delivery fee
Suggested offers are based on distance and hours
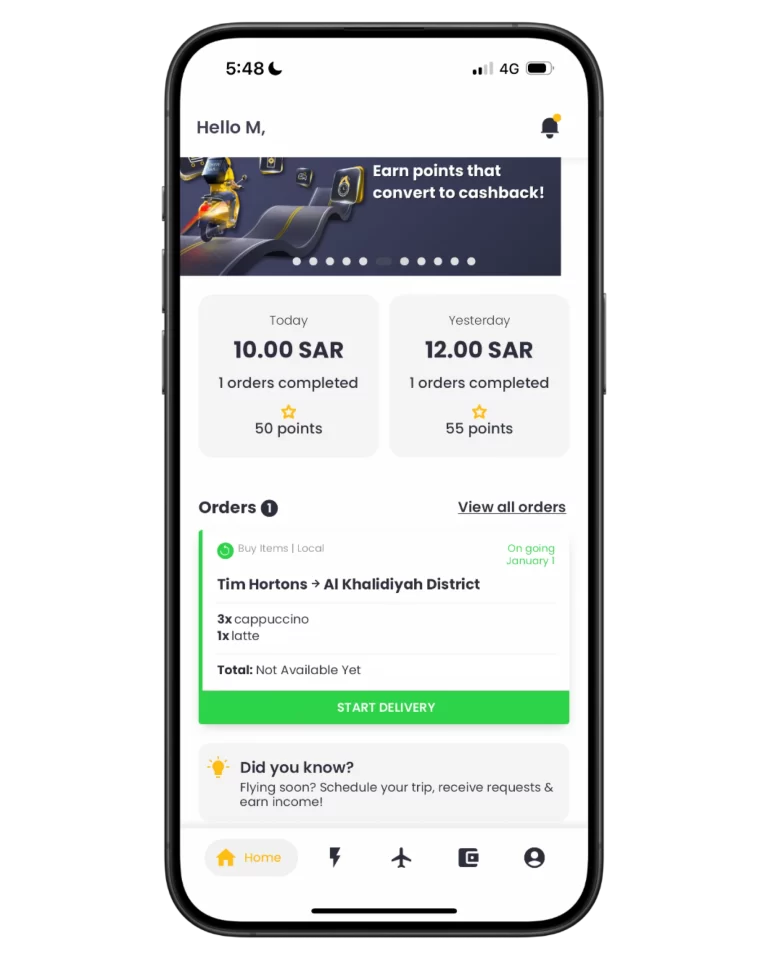
(5) Start Delivery
- Once the offer is accepted by the customer, you will receive a notification to start
- Click “Start Delivery”
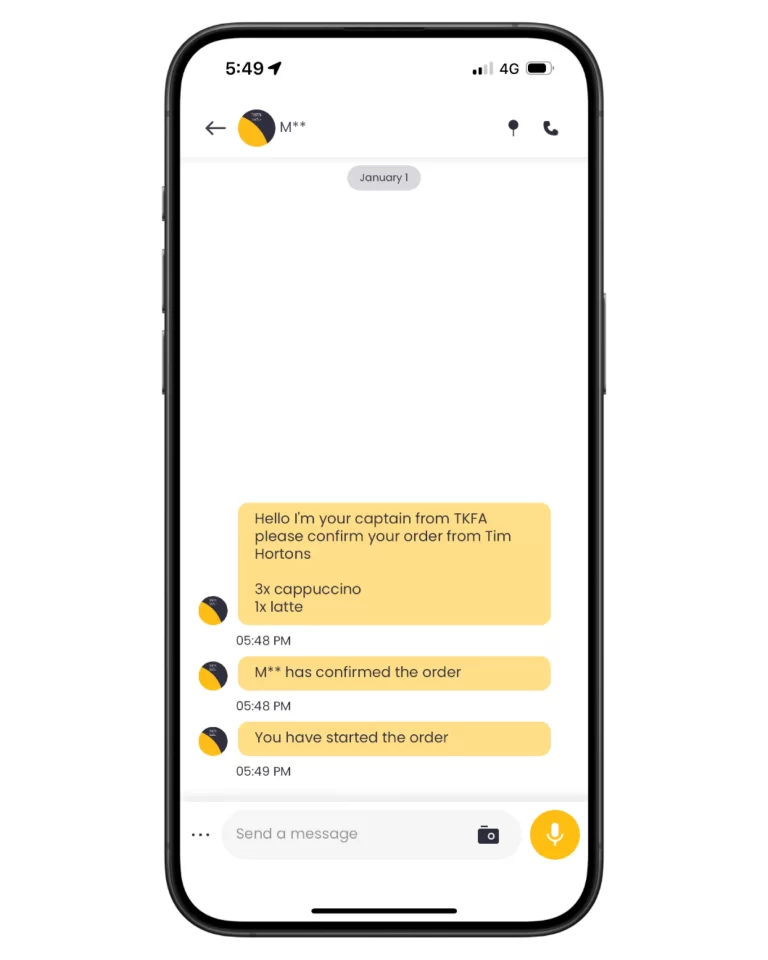
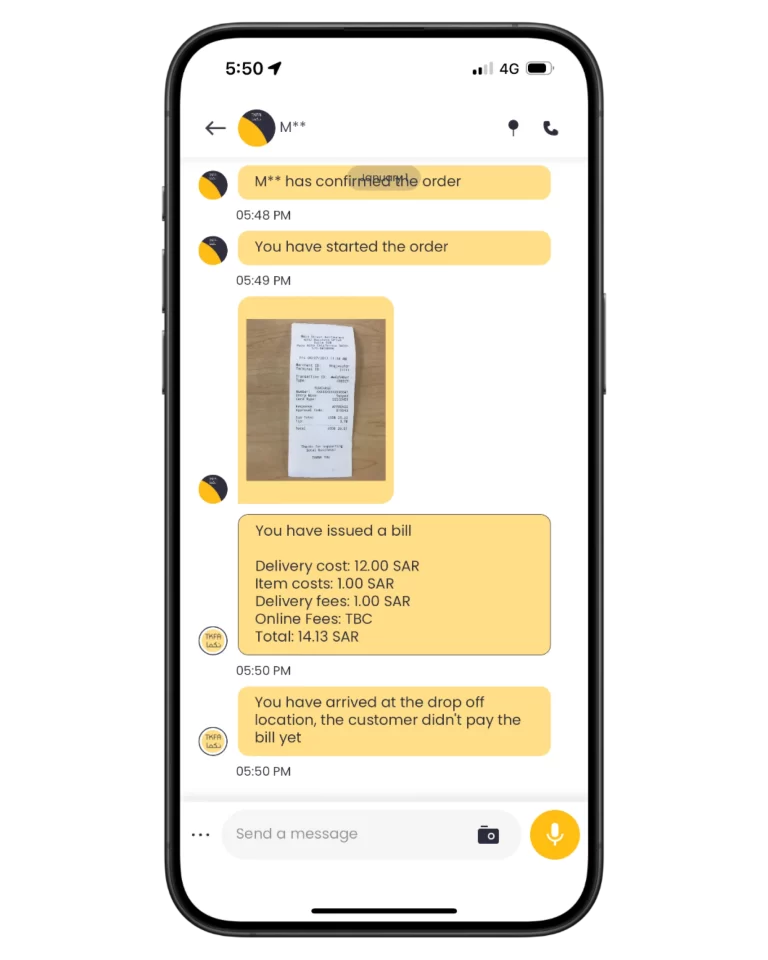
(6) Chat Page
- Once the customer confirms the order, the chat page will appear for communication
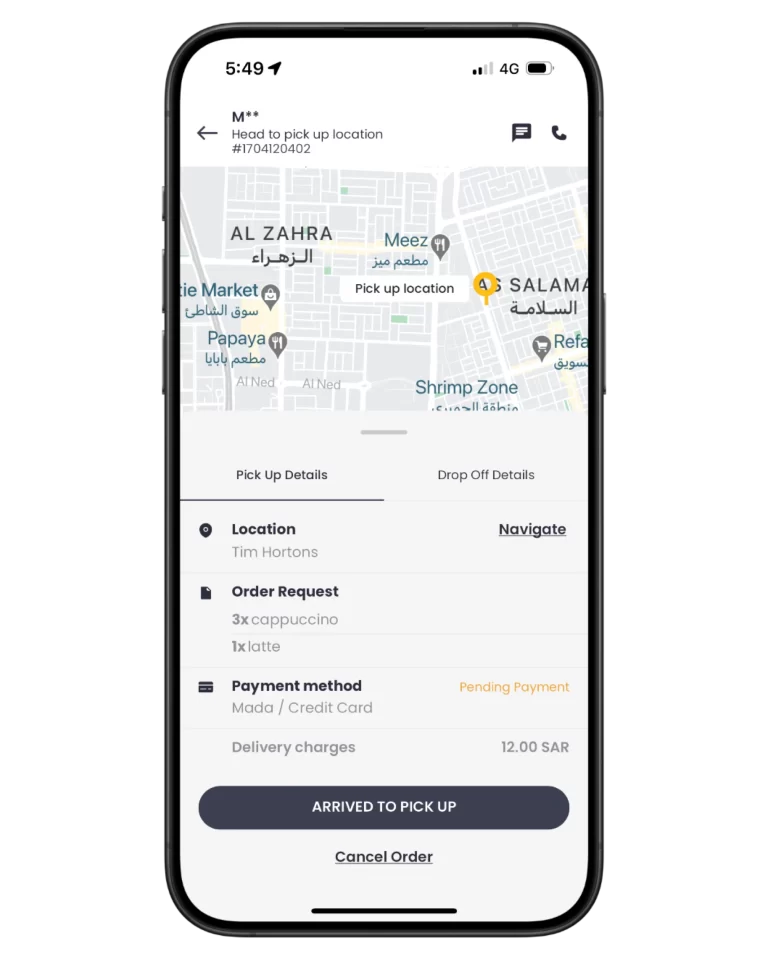
(7) Directions to Pick Up & Updates
- Under Pick Up details, click “Navigate” to open maps directions
- Click on “Arrived To Pick Up” when you reach the store

(8) Issue Invoice
- After purchasing items:
- Click on “Issue Invoice“
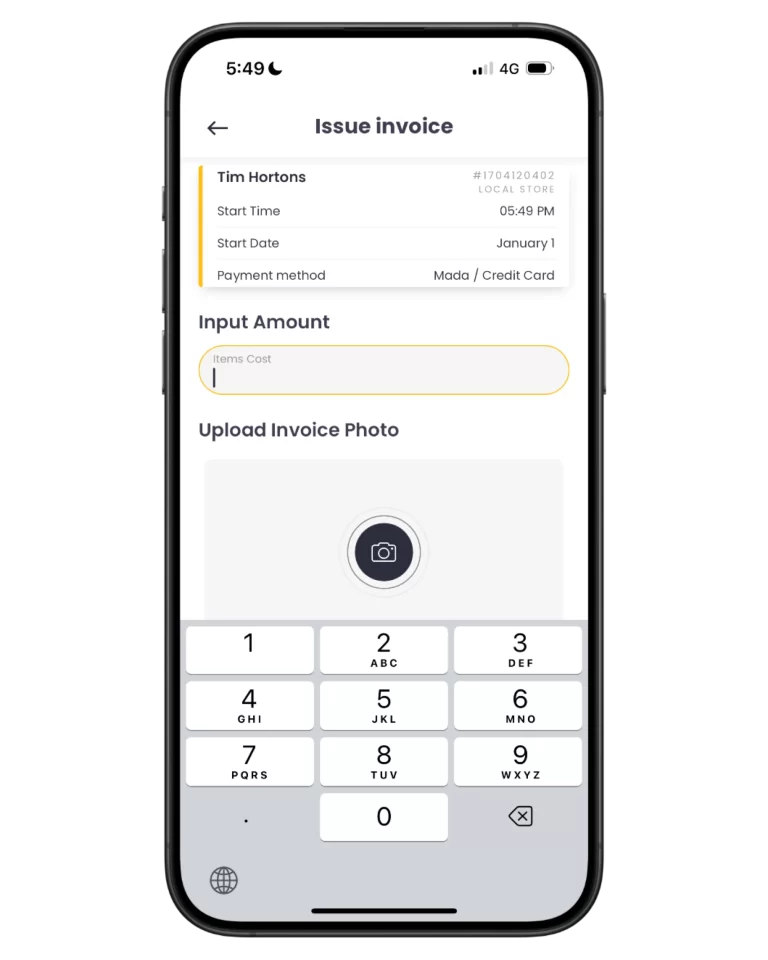
(9) Invoice Details
- Enter the items cost
- Upload a photo of the receipt
- Submit Invoice
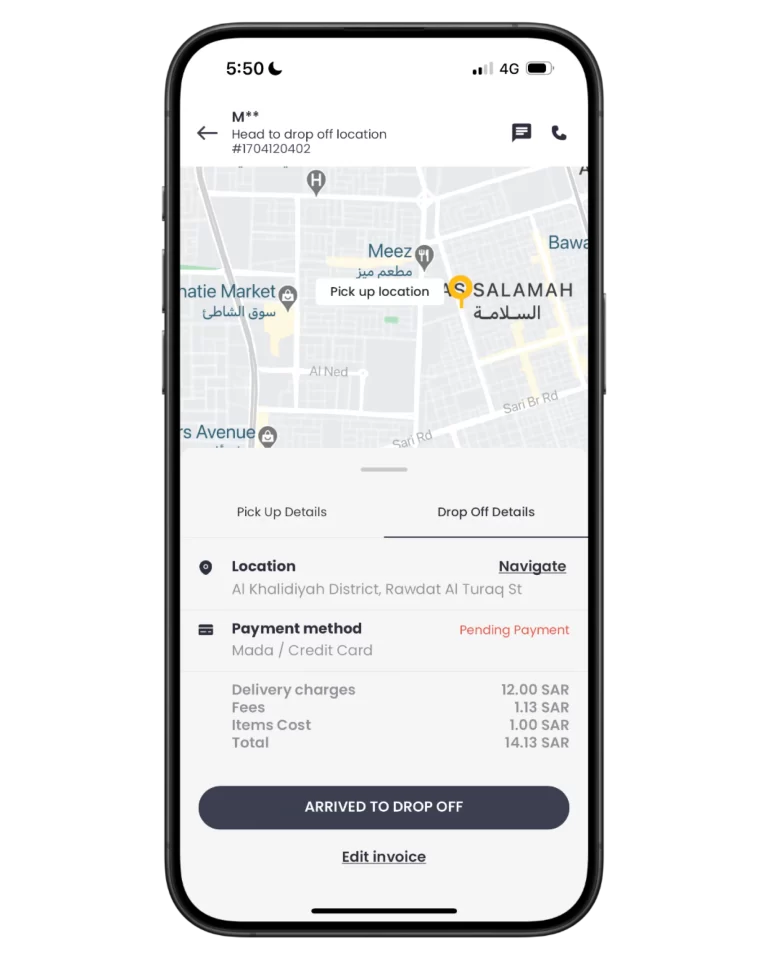
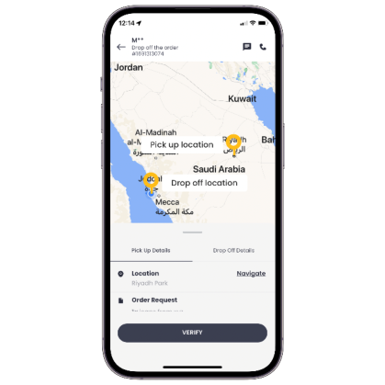
(10) Directions to Drop Off & Updates
- Under Drop Off details, click “Navigate” to open maps directions
- Click on “Arrived To Drop Off” when you reach the customer
(11) Payment Confirmation
- Make sure the customer has completed payment before handing off the items.
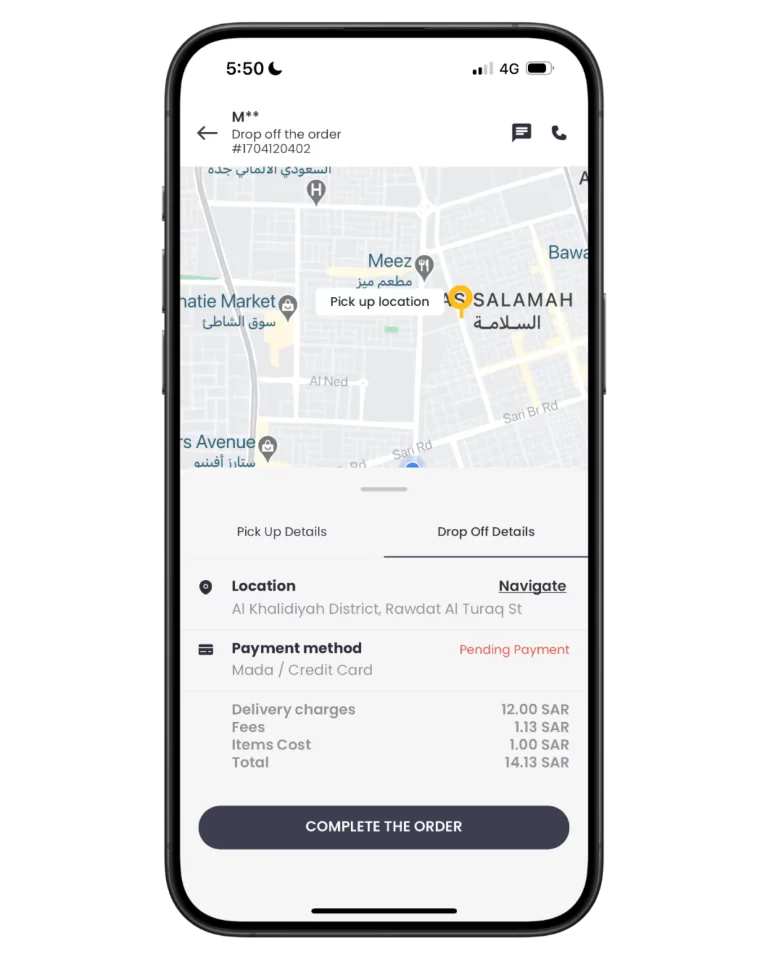
(12) Complete The Order
- Click on “Complete The Order” to end.
Accepting Orders & Process
What is the suggested delivery offer?
The suggested offer is automatically calculated based on distance from Store to Drop off point & the time of day
Peak hours have higher delivery fee suggestions, as well as earning extra bonus points for completing orders.
(1) Receiving Orders
- Make sure to enable “Online” to receive orders
- Offline: you won’t receive orders
(2) New Orders
- New orders will appear in the homepage
- Click on the order to view details
(3) Accept Order
- Click on “Accept” to place your delivery fee
(4) Delivery Fee
- Enter your delivery fee
Suggested offers are based on distance and hours
(5) Start Delivery
- Once the offer is accepted by the customer, you will receive a notification to start
- Click “Start Delivery”
(6) Chat Page
- Once the customer confirms the order, the chat page will appear for communication
(7) Directions to Pick Up & Updates
- Under Pick Up details, click “Navigate” to open maps directions
- Click on “Arrived To Pick Up” when you reach the store
(8) Issue Invoice
- After purchasing items:
- Click on “Issue Invoice“
(9) Invoice Details
- Enter the items cost
- Upload a photo of the receipt
- Submit Invoice
(10) Directions to Drop Off & Updates
- Under Drop Off details, click “Navigate” to open maps directions
- Click on “Arrived To Drop Off” when you reach the customer
(11) Payment Confirmation
- Make sure the customer has completed payment before handing off the items.
(12) Complete The Order
- Click on “Complete The Order” to end.
Creating a Domestic Trip
- If you’re traveling and returning back to your home city.
- You may schedule travel details to receive requests from customers to buy or pick up items in your current city, and have it delivered when you return home.
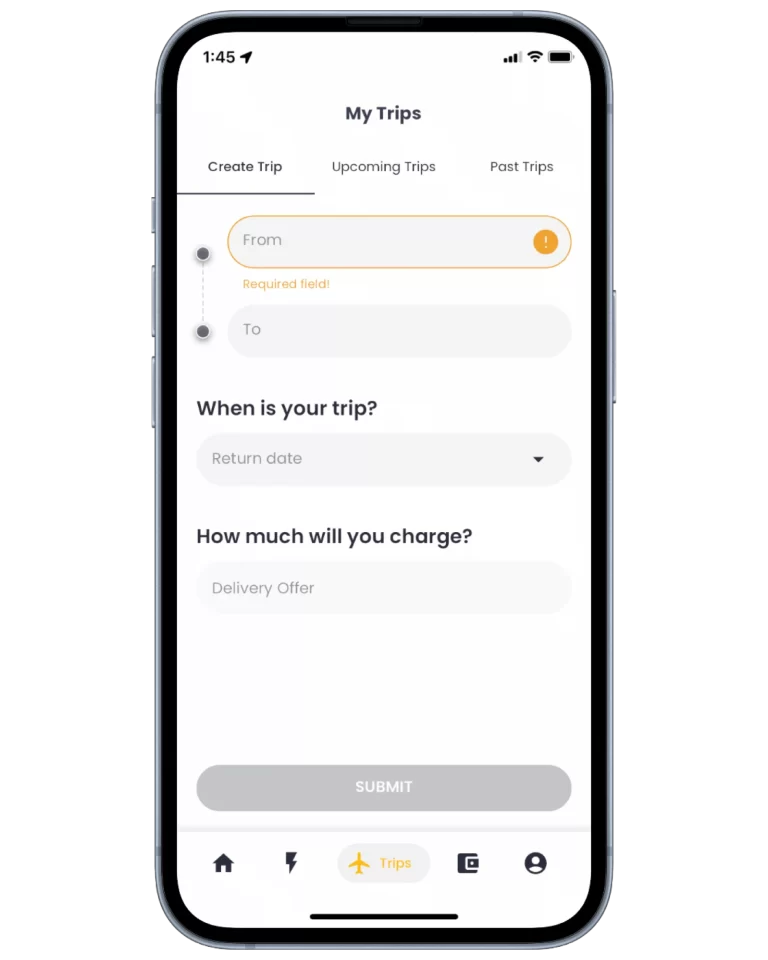
(1)
Adding Trip
- Click on “Trips” menu
(2) Trip Details
- Add from/to cities
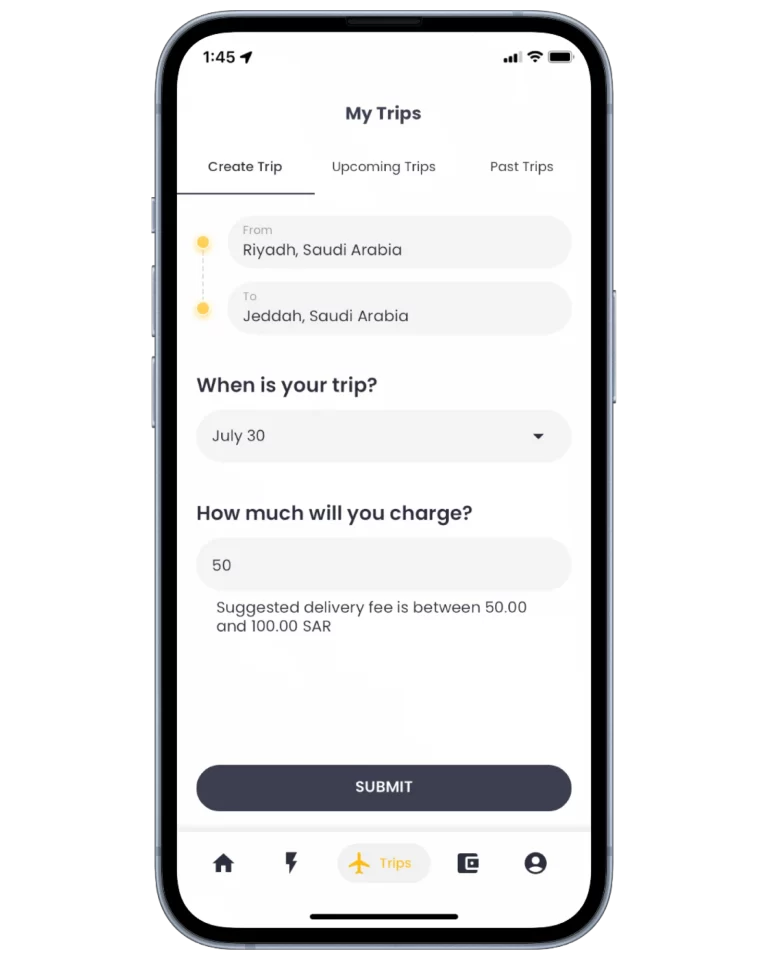
(3) Confirm
- Add your trip details, date & offer
Creating a Domestic Trip
- If you’re traveling and returning back to your home city.
- You may schedule travel details to receive requests from customers to buy or pick up items in your current city, and have it delivered when you return home.
(1)
Adding Trip
- Click on “Trips” menu
(2) Trip Details
- Add from/to cities
(3) Start Order
- Add your trip details, date & offer
Domestic Orders
How does it work for Captains?
1. Set your Home City
Profile->Personal Information->Home City->Add
2. Add your Preferred Cities from the “Cities” button in home or
Profile->General Settings->Add Preferred Cities->Add Cities->Save
3. Add your next Trip to notify customers, and receive order requests.
Home->Trips->Create Trip and add the details
If you have listed your Preferred Cities and you are either traveling to or currently in one of those cities but haven’t planned a trip yet, you will start receiving notifications from customers who are requesting orders to be fulfilled and delivered upon your return to your Home City.
As an example, if you have listed Jeddah as your Home City and you are either planning to travel or currently in Riyadh (without having created a trip yet), you will receive a notification when a customer requests a new order to be delivered from Riyadh to Jeddah. This notification alerts you to the customer’s interest in placing an order, and you will have the opportunity to submit your delivery offer.
1. If a customer has listed a city as one of their Preferred Cities and you create a trip to that city, they will be notified. Additionally, when customers are placing a new request, they may discover your availability.
2. Once a customer confirms your pre-set delivery offer, a notification will be sent to you to start the order.
3. When purchasing item(s), upon reaching the store, you will need to take a photo of the item(s), input the item price inclusive of VAT, or provide the VAT price separately (by unchecking the VAT included box and entering the VAT price) and submit to chat.
4. The customer will review the items, confirm their order, and make an online payment. Customers will receive a 6-digit verification code. The payment will be held until the item is delivered, and you must enter the correct verification code provided by the customer.
When will I receive my payment?
As a security measure for Domestic Orders, TKFA will hold customer payments until the delivery is confirmed with the 6-digit verification code from the customer.
- Captains must enter the correct verification code provided by the customer upon delivery to complete the order, and release the payments into your wallet.
-
Captains must not hand over the items or package without first receiving the verification code from the customer, at delivery, and entering it into the app. Failing to obtain the code will prevent the release of payments.
In the event that the customer fails to provide the verification code to the Captain for any reason, please raise a ticket and upload a photo of the items, along with their corresponding prices. TKFA will review the order and proceed to release the payments to the Captain.

(1) Starting Orders
- Once a customer confirms your pre-set delivery offer, a notification will be sent to you to start the order.
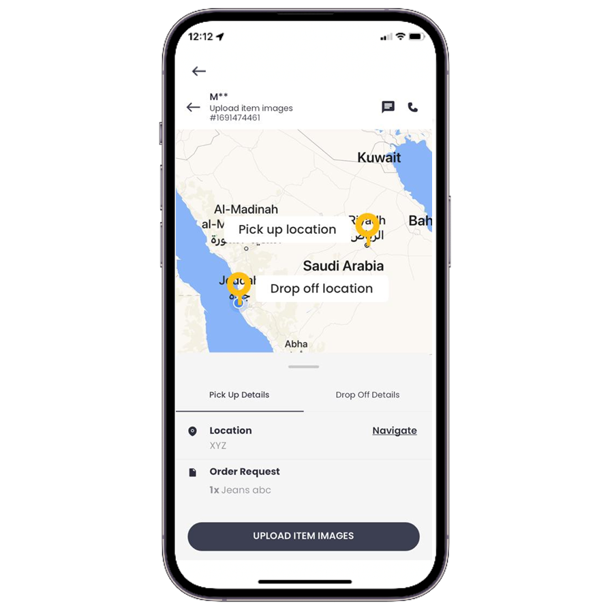
(2) Item Verification
- Next step before purchasing an item, is sharing a photo & price for customer confirmation
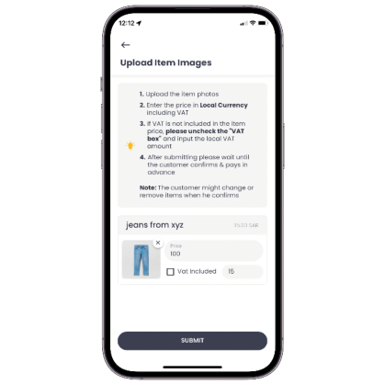
(3) Item photo & Price
- Upon reaching the store, you will need to take a photo of the item(s), input the item price inclusive of VAT, or provide the VAT price separately (by unchecking the VAT included box and entering the VAT price) and submit to chat.
- The customer will review the items, confirm their order, and make an online payment.
- Customers will receive a 6-digit verification code.
- The payment will be held until the item is delivered, and you must enter the correct verification code provided by the customer.
(4) Delivery Verification
-
Captains must not hand over the items or package without first receiving the verification code from the customer, at delivery, and entering it into the app.
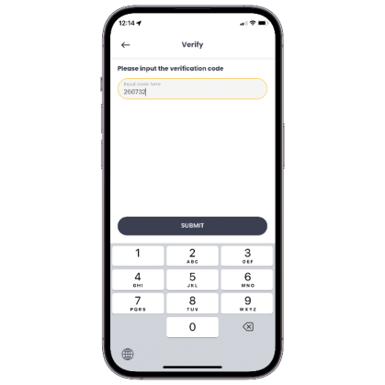
(5) Verification code
- Captains must enter the correct verification code provided by the customer upon delivery to complete the order, and release the payments into your wallet.
Domestic Orders
How does it work for Captains?
1. Set your Home City
Profile->Personal Information->Home City->Add
2. Add your Preferred Cities from the “Cities” button in home or
Profile->General Settings->Add Preferred Cities->Add Cities->Save
3. Add your next Trip to notify customers, and receive order requests.
Home->Trips->Create Trip and add the details
If you have listed your Preferred Cities and you are either traveling to or currently in one of those cities but haven’t planned a trip yet, you will start receiving notifications from customers who are requesting orders to be fulfilled and delivered upon your return to your Home City.
As an example, if you have listed Jeddah as your Home City and you are either planning to travel or currently in Riyadh (without having created a trip yet), you will receive a notification when a customer requests a new order to be delivered from Riyadh to Jeddah. This notification alerts you to the customer’s interest in placing an order, and you will have the opportunity to submit your delivery offer.
1. If a customer has listed a city as one of their Preferred Cities and you create a trip to that city, they will be notified. Additionally, when customers are placing a new request, they may discover your availability.
2. Once a customer confirms your pre-set delivery offer, a notification will be sent to you to start the order.
3. When purchasing item(s), upon reaching the store, you will need to take a photo of the item(s), input the item price inclusive of VAT, or provide the VAT price separately (by unchecking the VAT included box and entering the VAT price) and submit to chat.
4. The customer will review the items, confirm their order, and make an online payment. Customers will receive a 6-digit verification code. The payment will be held until the item is delivered, and you must enter the correct verification code provided by the customer.
When will I receive my payment?
As a security measure for Domestic Orders, TKFA will hold customer payments until the delivery is confirmed with the 6-digit verification code from the customer.
- Captains must enter the correct verification code provided by the customer upon delivery to complete the order, and release the payments into your wallet.
-
Captains must not hand over the items or package without first receiving the verification code from the customer, at delivery, and entering it into the app. Failing to obtain the code will prevent the release of payments.
In the event that the customer fails to provide the verification code to the Captain for any reason, please raise a ticket and upload a photo of the items, along with their corresponding prices. TKFA will review the order and proceed to release the payments to the Captain.
(1) Starting Orders
- Once a customer confirms your pre-set delivery offer, a notification will be sent to you to start the order.
(2) Item Verification
- Next step before purchasing an item, is sharing a photo & price for customer confirmation
(3) Item photo & Price
- Upon reaching the store, you will need to take a photo of the item(s), input the item price inclusive of VAT, or provide the VAT price separately (by unchecking the VAT included box and entering the VAT price) and submit to chat.
- The customer will review the items, confirm their order, and make an online payment.
Customers will receive a 6-digit verification code. - The payment will be held until the item is delivered, and you must enter the correct verification code provided by the customer.
(4) Delivery Verification
- The customer will review the items, confirm their order, and make an online payment.
- Customers will receive a 6-digit verification code.
- The payment will be held until the item is delivered, and you must enter the correct verification code provided by the customer.
-
Captains must not hand over the items or package without first receiving the verification code from the customer, at delivery, and entering it into the app.
(5) Verification code
- Captains must enter the correct verification code provided by the customer upon delivery to complete the order, and release the payments into your wallet.
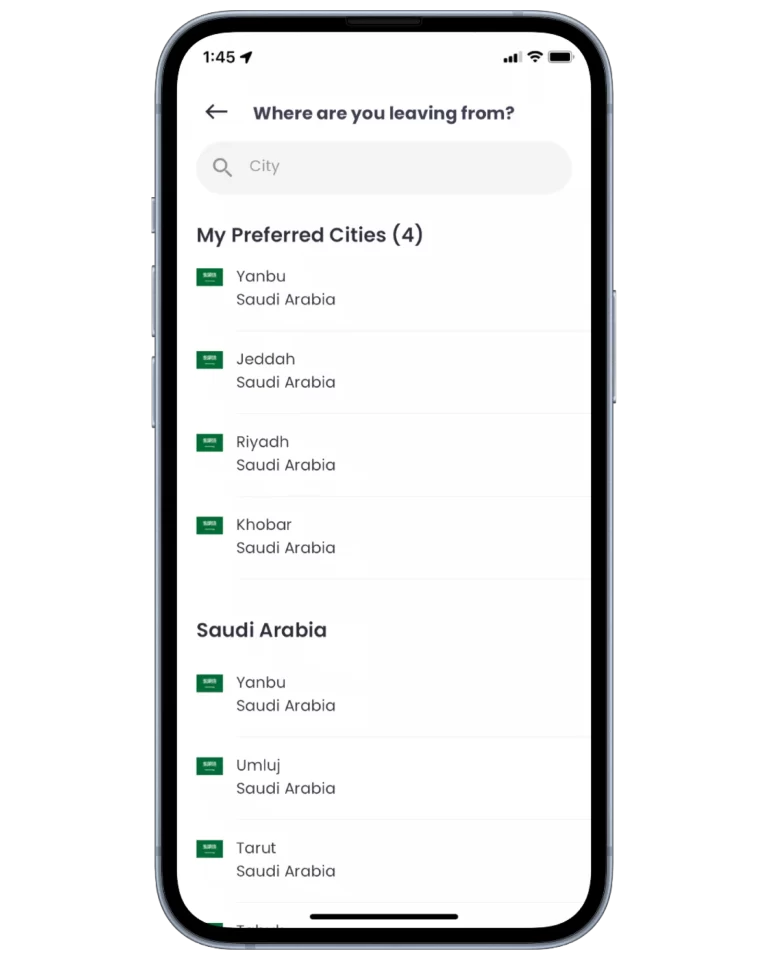
Adding Favorite Cities
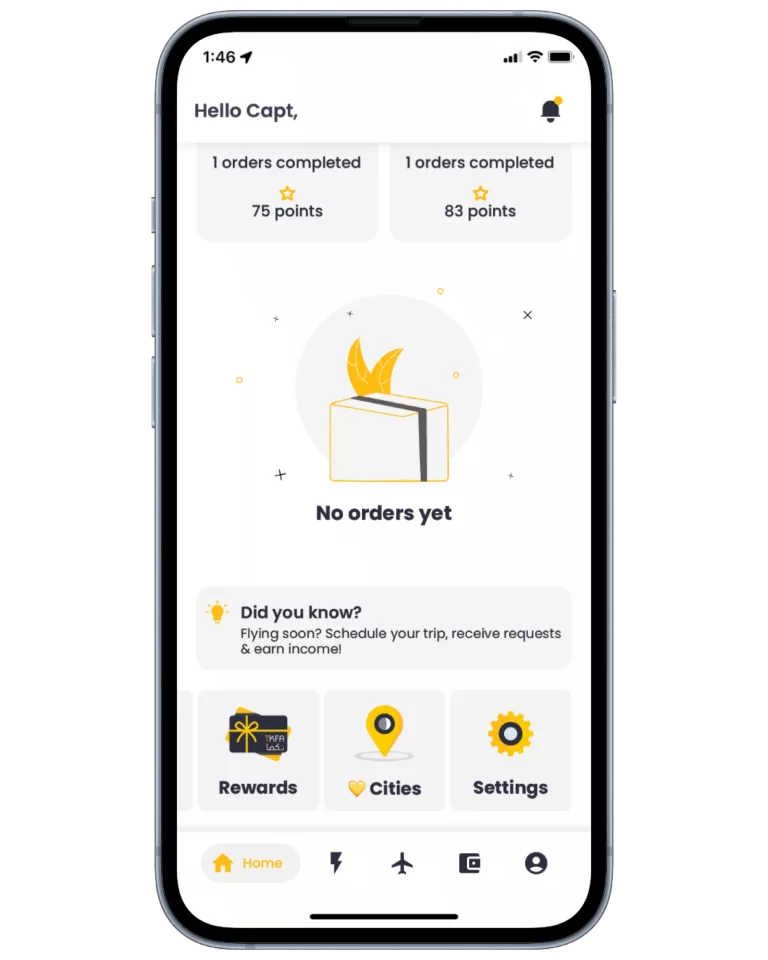
(1)
Adding Cities
- Click on “Cities” button
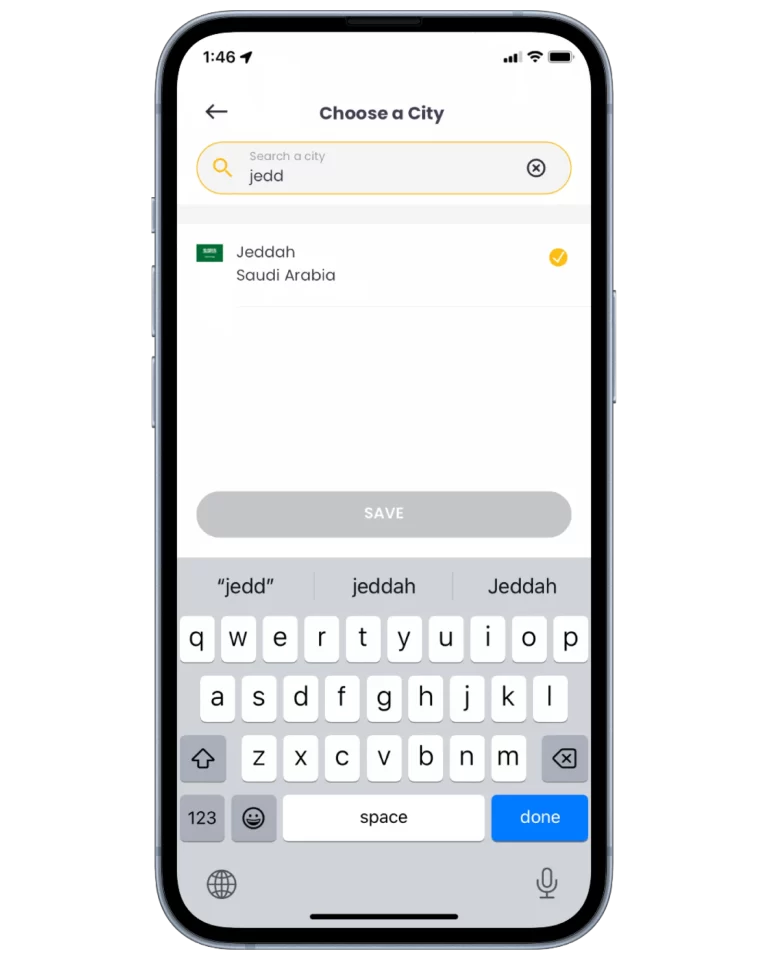
(2) Add Cities
- Search cities & add to favorites
- You will receive order notifications from customers placing requests from your favorite cities
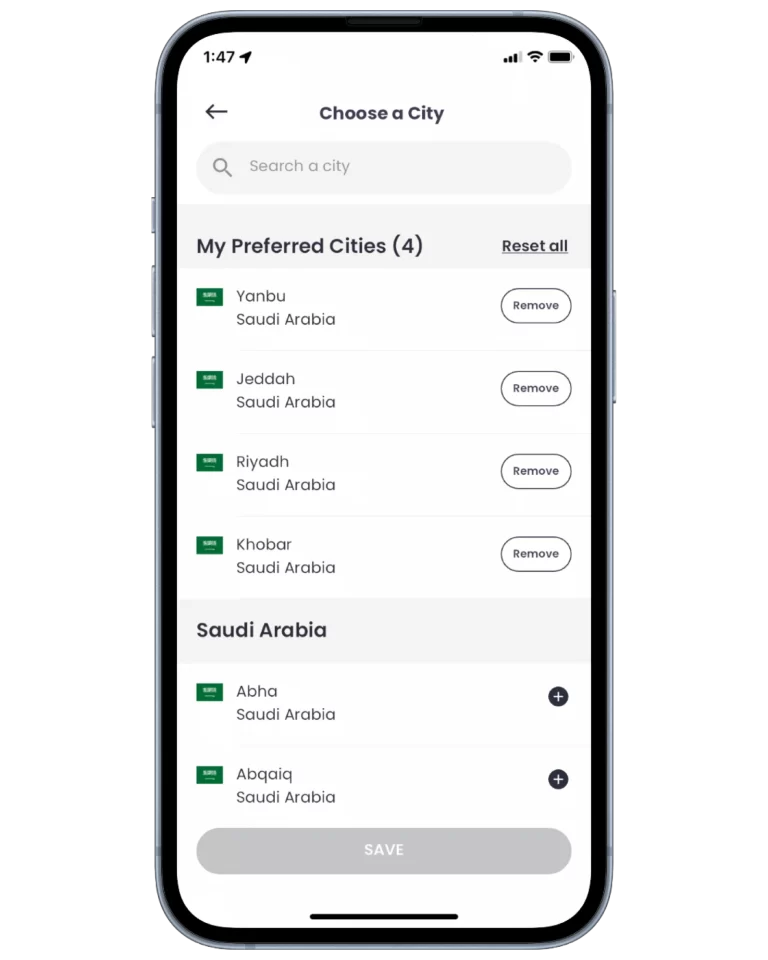
(3) Favorite Cities
- View, add, and remove
Adding Favorite Cities
(1)
Adding Cities
- Click on “Cities” button
(2) Add Cities
- Search cities & add to favorites
- You will receive order notifications from customers placing requests from your favorite cities
(3) Favorite Cities
- View, add, and remove
Withdraw Balance to Bank
How to withdraw wallet balance?
Home->Wallet tab->Withdraw balance->Enter amount to withdraw to your bank account.
How many times can I withdraw money to my Bank account?
Withdraw to SNB account: multiple times per day
Withdraw to Non-SNB accounts: once every 14 days.
*Please note that this withdrawal frequency is specific to non-SNB accounts.
We advise you open an SNB account to get access to your funds more frequently and faster.
When will I receive the Depost to my Bank account?
After requesting withdrawal to your bank account.
To SNB Bank account: next day
To NON-SNB Bank account: +2 days.
We advise you open an SNB account to get access to your funds more frequently and faster.
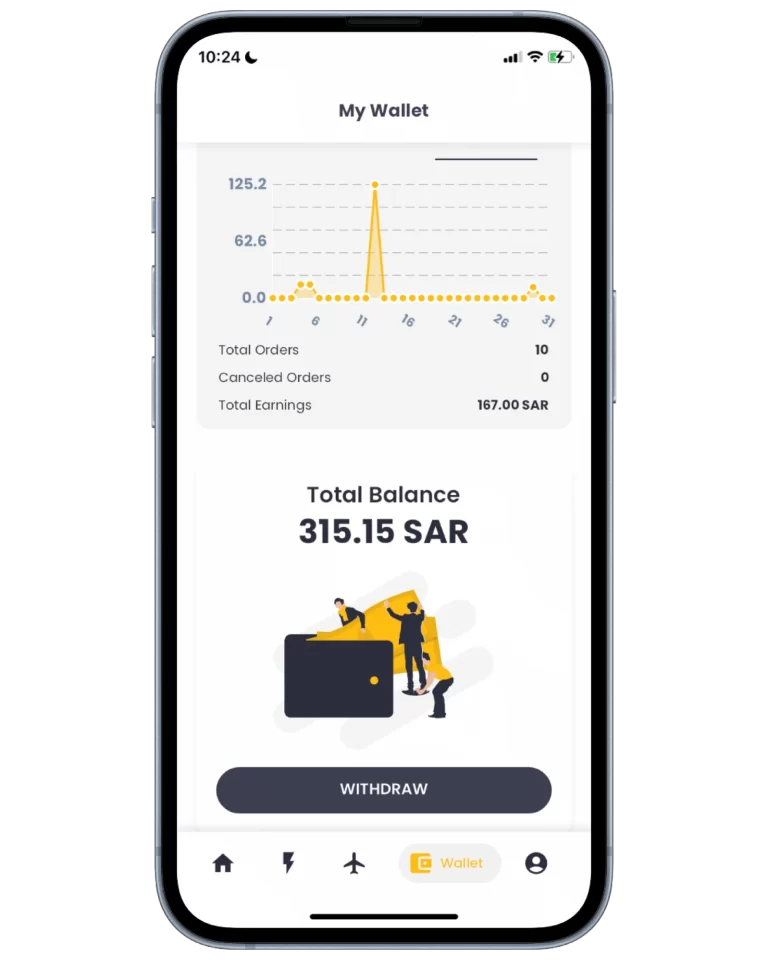
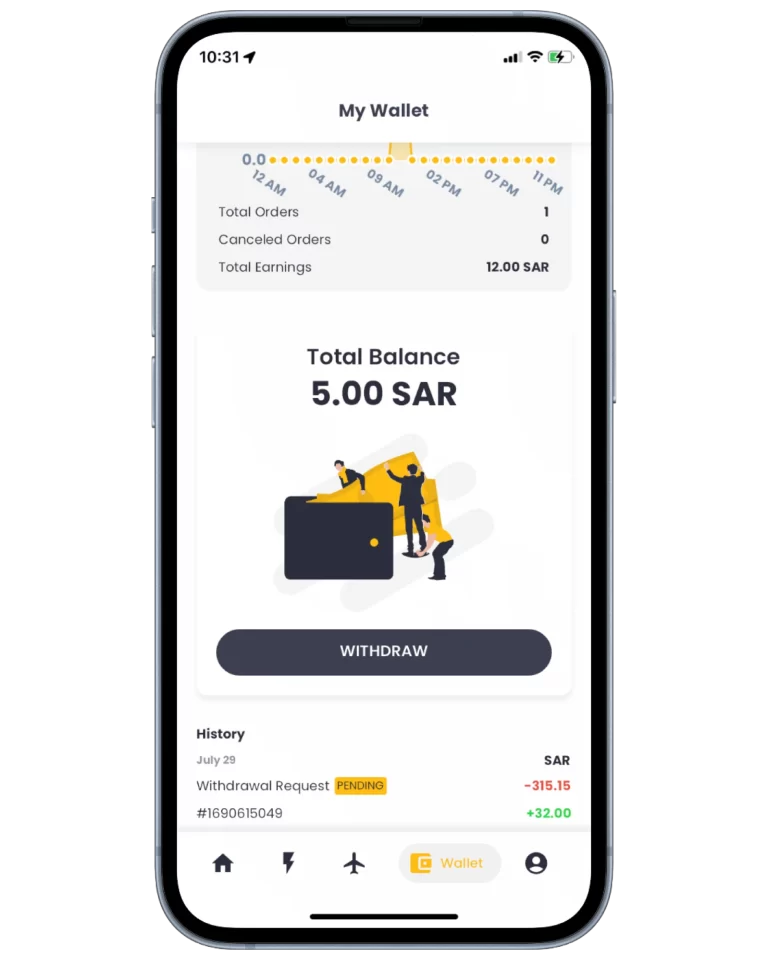
(1)
Wallet Balance
- Click on Wallet menu
- View current balance
- Click “Withdraw”
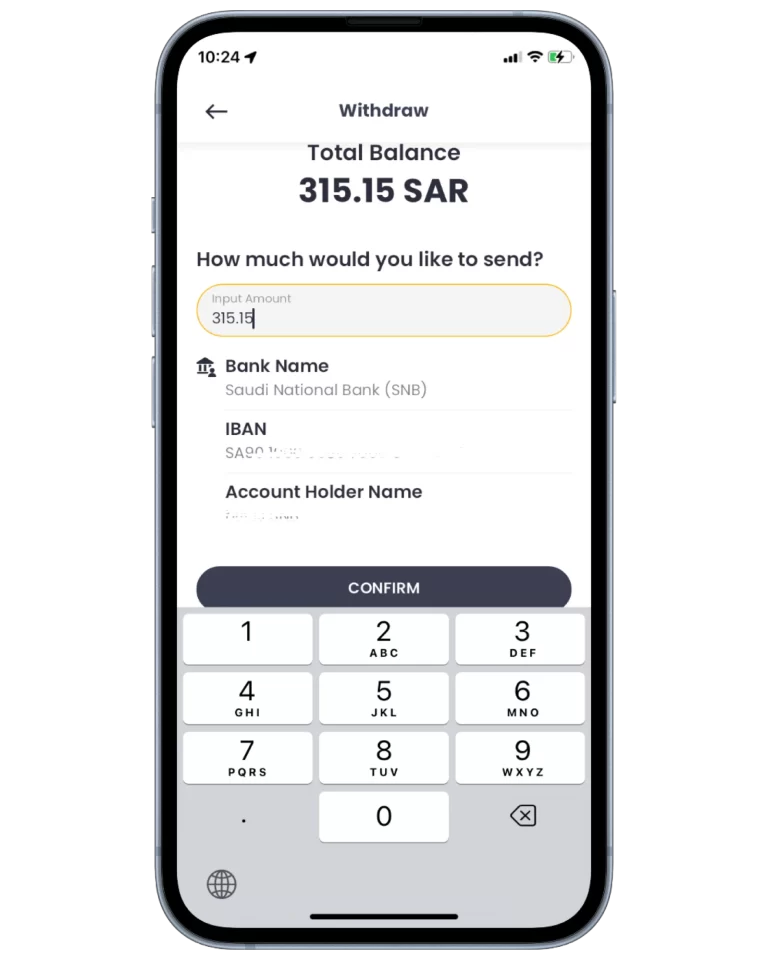
(2) Withdrawal Details
- Enter withdrawal amount
- Click Confirm
- Add/Edit payment details from Settings page->Payment details
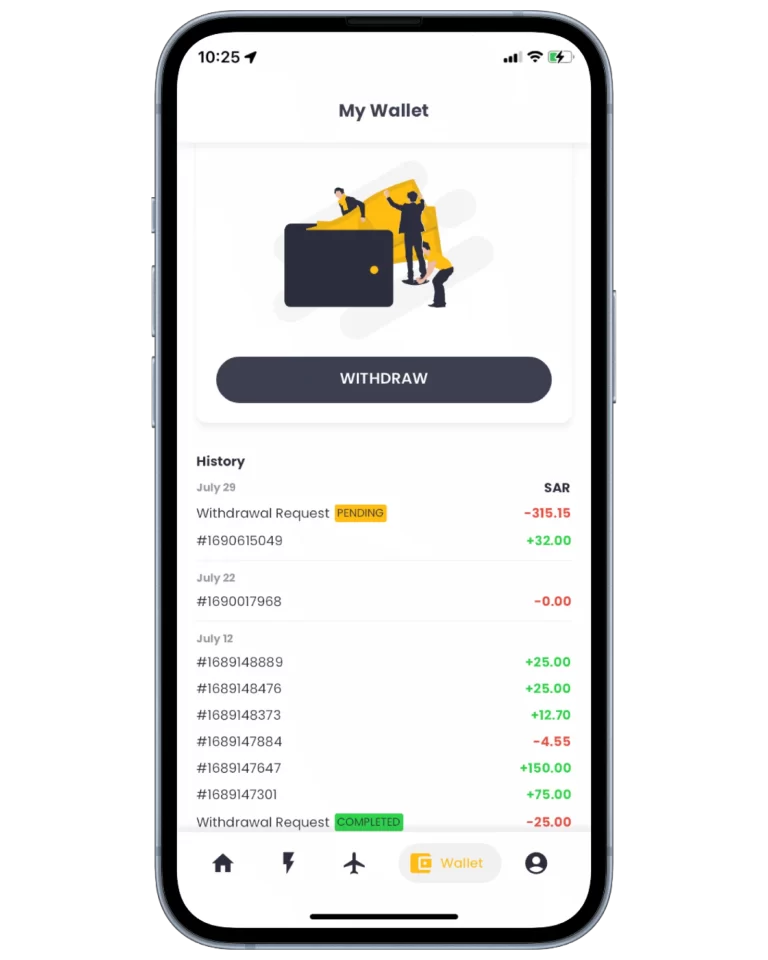
(3) History
- View all income & withdrawal history
Withdraw Balance to Bank
How to withdraw wallet balance?
Home->Wallet tab->Withdraw balance->Enter amount to withdraw to your bank account.
How many times can I withdraw money to my Bank account?
Withdraw to SNB account: multiple times per day
Withdraw to Non-SNB accounts: once every 14 days.
*Please note that this withdrawal frequency is specific to non-SNB accounts.
We advise you open an SNB account to get access to your funds more frequently and faster.
When will I receive the Depost to my Bank account?
After requesting withdrawal to your bank account.
To SNB Bank account: next day
To NON-SNB Bank account: +2 days.
We advise you open an SNB account to get access to your funds more frequently and faster.
(1)
Wallet Balance
- Click on Wallet menu
- View current balance
- Click “Withdraw”
(2) Withdrawal Details
- Enter withdrawal amount
- Click Confirm
- Add/Edit payment details from Settings page->Payment details
(3) History
- View all income & withdrawal history
Redeeming Rewards
Points are earned by completing actions:
Orders, Watch to Earn videos, and Sharing the app.
Each tier unlocks more benefits, rewards, and point multipliers.
At each tier, you will be able to maintain, upgrade to the next tier, or downgrade to lower tier for inactivity.
From the rewards page:
You can view your current points, points to upgrade or to maintain, and redeem to wallet or reward items.
You can convert points to your Wallet, which can be withdrawn to bank account or redeemed for exclusive rewards.
More details on Loyalty Program & Points
Please check our Loyalty Program page for all details -> Loyalty Program
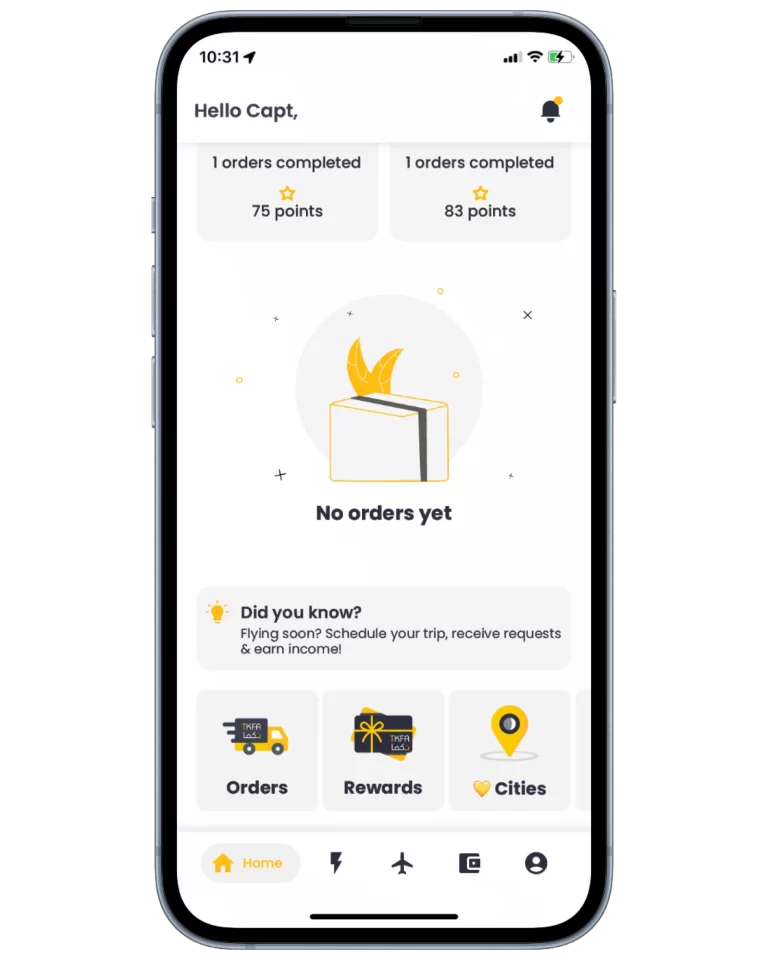
(1)
Rewards page
- Click on “Rewards” in homepage
- Or view from Settings page->My rewards
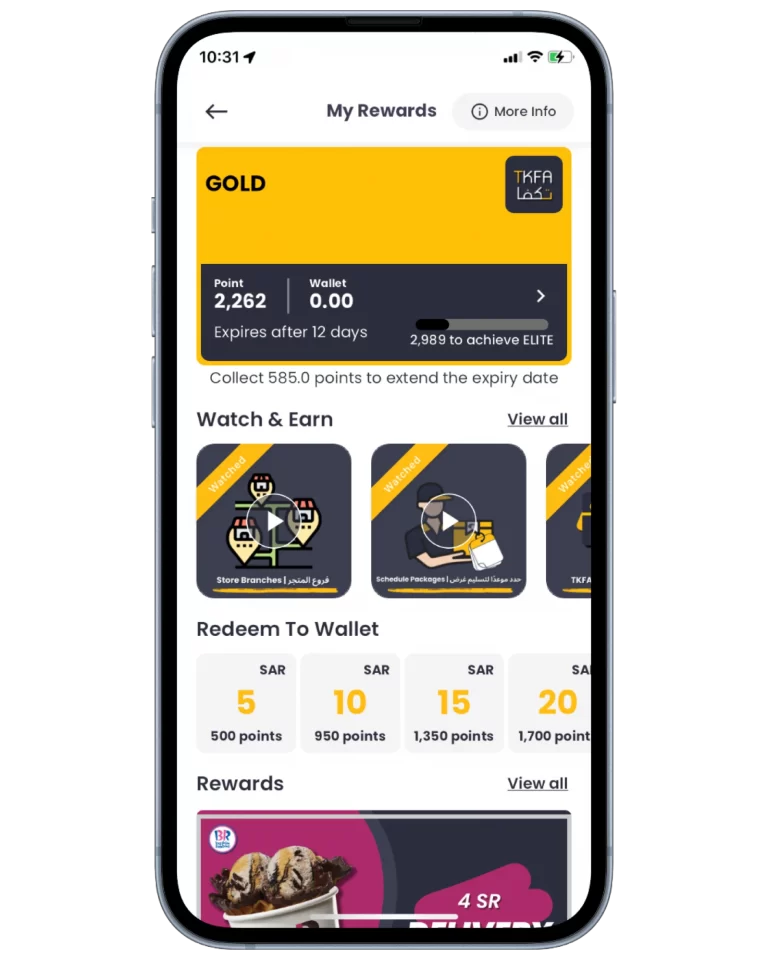
(2) Loyalty Status & Rewards
- View your Loyalty status, points, wallet balance, and rewards.
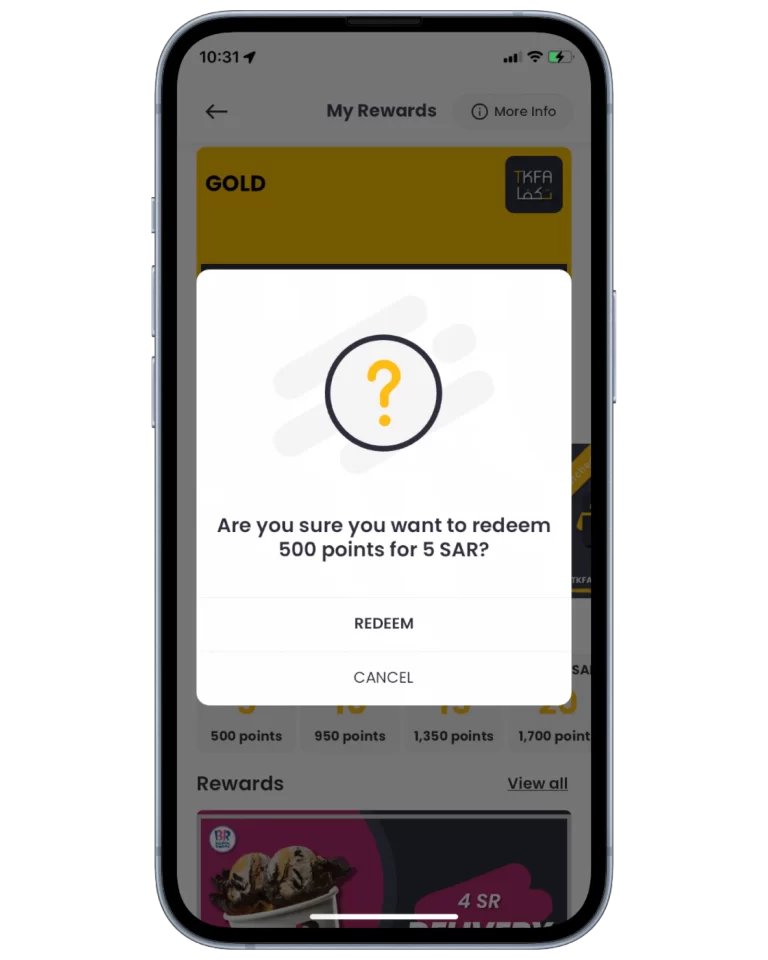
(3) Redeem to Wallet
- Pick a Redeem to Wallet value
- Redeem reward with points
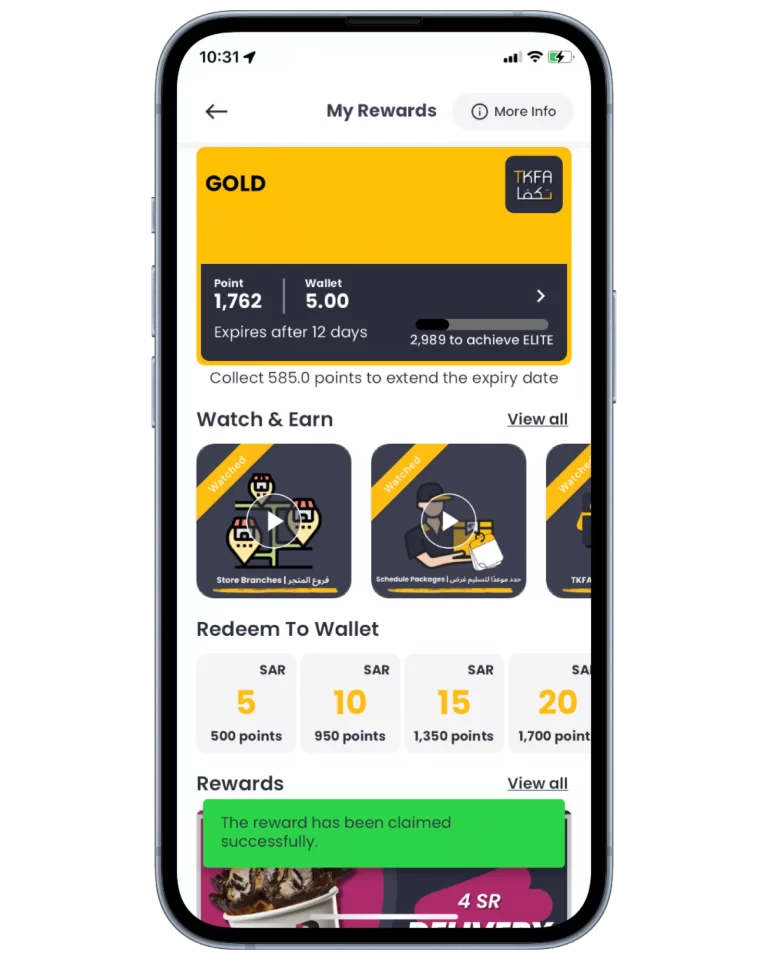
(4) Available Wallet Balance
- Once redeemed, the wallet balance will be updated
(5) Available Balance to withdraw
- Balance will also reflect in wallet available to withdraw to bank account.
Redeeming Rewards
Points are earned by completing actions:
Orders, Watch to Earn videos, and Sharing the app.
Each tier unlocks more benefits, rewards, and point multipliers.
At each tier, you will be able to maintain, upgrade to the next tier, or downgrade to lower tier for inactivity.
From the rewards page:
You can view your current points, points to upgrade or to maintain, and redeem to wallet or reward items.
You can convert points to your Wallet, which can be withdrawn to bank account or redeemed for exclusive rewards.
More details on Loyalty Program & Points
Please check our Loyalty Program page for all details -> Loyalty Program
(1)
Rewards page
- Click on “Rewards” in homepage
- Or view from Settings page->My rewards
(2) Loyalty Status & Rewards
- View your Loyalty status, points, wallet balance, and rewards.
(3) Redeem to Wallet
- Pick a Redeem to Wallet value
- Redeem reward with points
(4) Available Wallet Balance
- Once redeemed, the wallet balance will be updated
(5) Available Balance to withdraw
- Balance will also reflect in wallet available to withdraw to bank account.